


세계 최대의 오픈 소스 저작물 관리 시스템인 워드프레스를 리눅스에서 어떻게 설치를 해야되는지 알아보도록 하겠습니다.
기본적으로 APM이 설치된 리눅스 서버에서 워드프레스 설치를 진행하도록 하겠습니다.
우선 워드프레스 홈페이지에서 최신 버전이 어떻게 되는지 확인을 합니다.
한글 : ko.wordpress.org
영문 : wordpress.org
(2014.10.11 최신버전은 wordpress 4.0)
최신 버전을 확인 후, 워드프레스를 관리 할 유저를 만듭니다.
[root@localhost /]# groupadd smileserv
먼저 그룹을 생성후
[root@localhost /]# useradd -g smileserv smileserv
그 다음 유저를 생성합니다.
[root@localhost /]# passwd smileserv
Changing password for user smileserv.
New password:
Retype new password:
passwd: all authentication tokens updated successfully.
그리고 유저의 패스워드를 설정합니다.
[root@localhost /]# mkdir /home/smileserv/public_html
워드프레스를 관리 할 유저의 디렉토리에 public_html 디렉토리를 만들어 줍니다. 추후에 워드프레스 디렉토리가 여기로 옮겨져 아파치 경로값을 설정 해 줄 디렉토리입니다.
[root@localhost /]# chmod 711 /home/smileserv
추후에 워드프레스가 들어올 디렉토리라서 실행권한을 모두에게 줍니다.
[root@localhost /]# cd /usr/local/src/
워드프레스를 다운 받을 경로로 이동합니다.
[root@localhost src]# wget https://ko.wordpress.org/wordpress-4.0-ko_KR.tar.gz
–2014-10-11 02:03:54– https://ko.wordpress.org/wordpress-4.0-ko_KR.tar.gz
워드프로세스를 다운 받습니다. 현재 최신버전이 4.0이라서 4.0 압축파일을 다운받았습니다.
[root@localhost src]# tar xvfz wordpress-4.0-ko_KR.tar.gz
wordpress/
wordpress/wp-comments-post.php
wordpress/wp-signup.php
wordpress/wp-admin/
wordpress/wp-admin/upgrade-functions.php
wordpress/wp-admin/ms-users.php
압축파일을 다운 받았으니 풀어줍니다.
[root@localhost src]# mv wordpress /home/smileserv/public_html/
워드프레스 디렉토리를 public_html 디렉토리 안에 넣어줍니다.
[root@localhost src]# chown -R smileserv:smileserv /home/smileserv/public_html/
pulic_html 안에 있는 모든 디렉토리와 파일들의 소유자를 smileserv 그리고 그룹을 smileserv로 변경 해 줍니다.
[root@localhost src]#chmod 777 /home/smileserv/public_html/wordpress
wordpress 디렉토리를 777로 설정합니다. 이 부분을 해주지 않으면 추후에 다음과 같은 에러메세지를 볼 수 있습니다.
———————————————————————————————————–
죄송합니다. wp-config.php파일에 쓰기가 불가능합니다.
wp-config.php파일을 수동으로 만들고 다음의 텍스트를 안에 붙여 넣을 수 있습니다.
———————————————————————————————————–
[root@localhost src]# mysql -p
Enter password:
Welcome to the MySQL monitor. Commands end with ; or \g.
이제는 데이터베이스에서 설정을 해 줍니다.
mysql> use mysql
Database changed
mysql 데이터베이스로 이동을 합니다.
mysql> create database smileserv_wordpress;
Query OK, 1 row affected (0.00 sec)
여기서 smileserv_wordpress 라는 데이터베이스를 만듭니다.
mysql> grant all privileges on smileserv_wordpress.* to smileserv@localhost identified by “idchowto”;
Query OK, 0 rows affected (0.00 sec)
워드프레스 데이터베이스를 관리 할 유저와 권한을 생성합니다. 유저를 smileserv로 했고 암호를 idchowto로 하였습니다.
mysql> flush privileges;
Query OK, 0 rows affected (0.00 sec)
데이터베이스에서 설정했던 내용들을 저장시킵니다.
mysql> exit
Bye
데이터베이스에서 빠져나옵니다.
[root@localhost src]# vi /usr/local/apache/conf/httpd.conf
아파치에서 워드프레스에 관련된 것을 설정 해 줍니다.
———————————————————————————————
# symbolic links and aliases may be used to point to other locations.
#
DocumentRoot “/home/smileserv/public_html/wordpress/“
#
# Each directory to which Apache has access can be configured with respect
# This should be changed to whatever you set DocumentRoot to.
#
<Directory “/home/smileserv/public_html/wordpress/“>
#
# Possible values for the Options directive are “None”, “All”,
———————————————————————————————
기본 디렉토리를 워드프레스 디렉토리로 하기 위해서 httpd.conf에서 위와 같은 2가지만 변경하여 줍니다.
[root@localhost src]# /etc/init.d/apachectl restart
그리고 아파치를 재시작하여 줍니다.
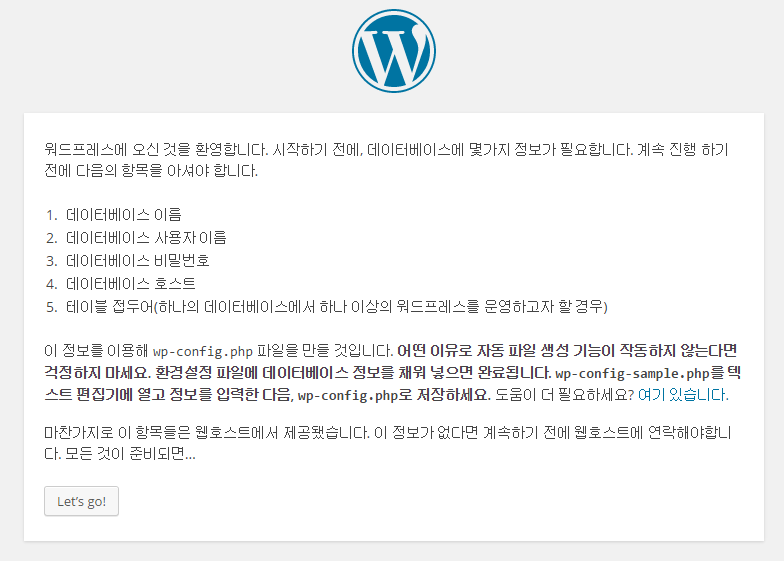
인터넷에서 해당서버의 ip주소를 입력하면 위와 같은 화면을 보실 수 있습니다.
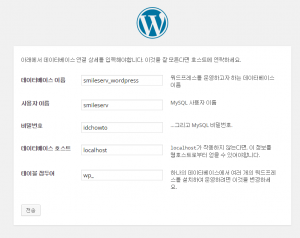
그 다음 화면에서는 데이터베이스에 관련된 정보들을 입력합니다.
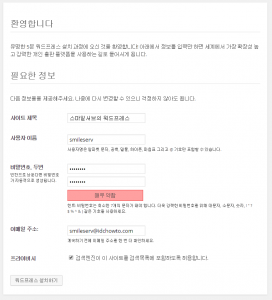
여기서는 워드프레스와 관련된 기본정보를 입력합니다. 해당 페이지에서 입력한 정보들을 나중에 변경이 가능합니다.
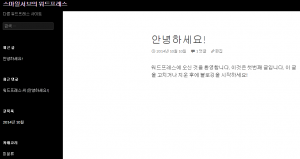
설치완료 후에 로그인 하시면 위와 같은 워드프레스 첫 페이지를 보실 수 있습니다.
이상으로 리눅스에서 워드프레서 설치 메뉴얼을 마치도록 하겠습니다.
출처 및 참조 : http://blog.naver.com/smile_cloud/150180070980
[polldaddy rating=”7739789″]
$설치디렉토리/wp-content/uploads 여기서부터 하위만 777퍼미션주시고 전체 디렉토리를 777주시면 절때안되요!