1. snmp 설치
# yum install net-snmp
# yum install net-snmp-utils
# yum install net-snmp-devel
2. mrtg 설치
# yum install mrtg*
3. snmp 설정
# vi /etc/snmp/snmpd.conf (first, second, third, final 섹션만 변경)
# first
com2sec local localhost webnics
# second
group localgroup v1 local
group localgroup v2c local
group localgroup usm local
# third
view all included .1 80
view systemview included system
# final
access localgroup “” any noauth exact all none none
* webnics는 community 값이라고 하는데… 쉽게 설명해 접근하는 계정? 이라고 합니다.
# snmpwalk -v 2c -c webnics localhost (설정 확인하기)
…..
DISMAN-EVENT-MIB::mteEventNotificationObjectsOwner.”_snmpd”.’_mteTriggerRising’ = STRING: _snmpd
DISMAN-EVENT-MIB::mteEventNotificationObjects.”_snmpd”.’_linkDown’ = STRING: _linkUpDown
DISMAN-EVENT-MIB::mteEventNotificationObjects.”_snmpd”.’_linkUp’ = STRING: _linkUpDown
DISMAN-EVENT-MIB::mteEventNotificationObjects.”_snmpd”.’_mteTriggerFailure’ = STRING: _triggerFail
DISMAN-EVENT-MIB::mteEventNotificationObjects.”_snmpd”.’_mteTriggerFalling’ = STRING: _triggerFire
DISMAN-EVENT-MIB::mteEventNotificationObjects.”_snmpd”.’_mteTriggerFired’ = STRING: _triggerFire
DISMAN-EVENT-MIB::mteEventNotificationObjects.”_snmpd”.’_mteTriggerRising’ = STRING: _triggerFire
NOTIFICATION-LOG-MIB::nlmConfigGlobalEntryLimit.0 = Gauge32: 1000
NOTIFICATION-LOG-MIB::nlmConfigGlobalAgeOut.0 = Gauge32: 1440 minutes
NOTIFICATION-LOG-MIB::nlmStatsGlobalNotificationsLogged.0 = Counter32: 0 notifications
NOTIFICATION-LOG-MIB::nlmStatsGlobalNotificationsBumped.0 = Counter32: 0 notifications
메시지들이 많이 뜨게되면 정상입니다.
4. cfg 생성
# cfgmaker –global ‘WorkDir: /ft/mrtg/’ –global ‘Language: korean’ –global ‘Options[_]: bits,growright’ -output /etc/mrtg/mrtg.cfg webnics@localhost
WorkDir: /ft/mrtg/ –> 내 웹소스 있는경로에 mrtg디렉토리 만들면됩니다.
5. index 생성
indexmaker –title “Title” –output /website/mrtg/index.htm /etc/mrtg/mrtg.cfg
6. cron 등록
# crontab -e
*/5 * * * * root /usr/sbin/mrtg /etc/mrtg/mrtg.cfg
7.웹에서 확인
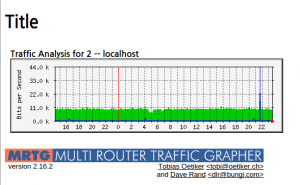
http://서버아이피/mrtg/
mrtg 를 확인할수 있습니다.
[polldaddy rating=”7739789″]


